Quick Guide to Self-Service Banner Registration
- Login to the myRCC student portal using a web browser. Google Chrome is recommended.
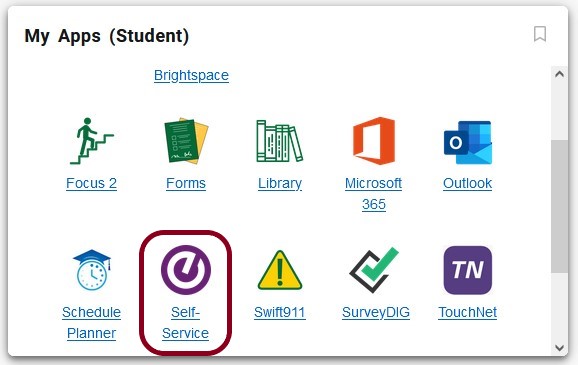
- Click on the Self-Service link under My Apps.
 The Banner Student Services page will open as seen below.
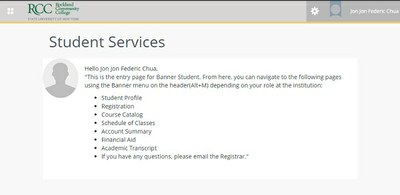
- Click on the Ellucian Menu (the four boxes) or click Alt + M – then under Student Menu, click on Student Registration Self Service
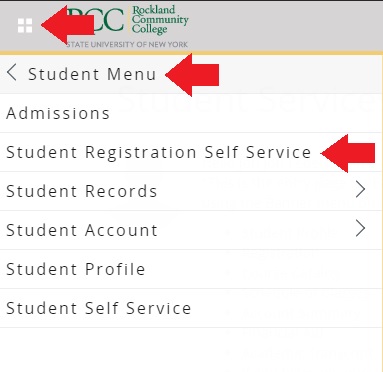
You are now on the Banner Student Registration page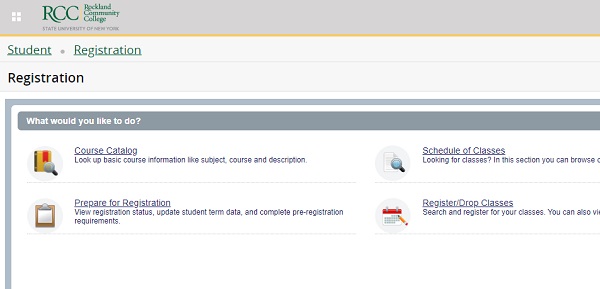
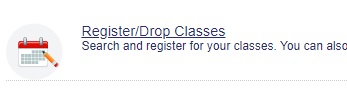
- Click on the Register/Drop Classes link
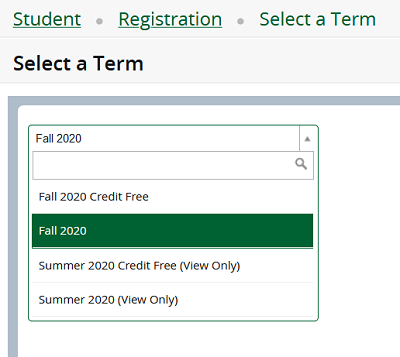
- Choose a Term from the drop down and click Continue.
- From here, you can register two different ways:
Register using Find Classes tab or Enter CRNs tab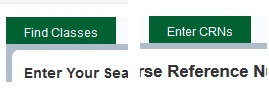
- Find Classes tab
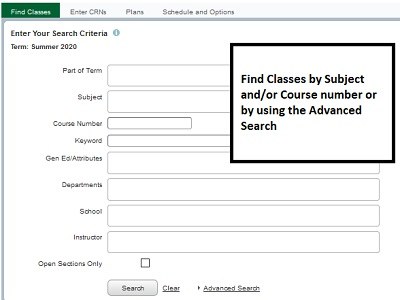
- Click the blank box next to Subject to scroll through the subjects or type in the desired subject. Click Search.
- Click on the Course title to view details about the course.
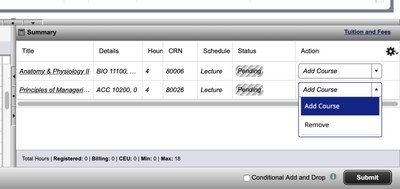
- Click on the Add button to the right to add the course to your Registration Summary. The added course will be posted under Summary section to the bottom right of the screen and on the Schedule section to the bottom left of the screen.
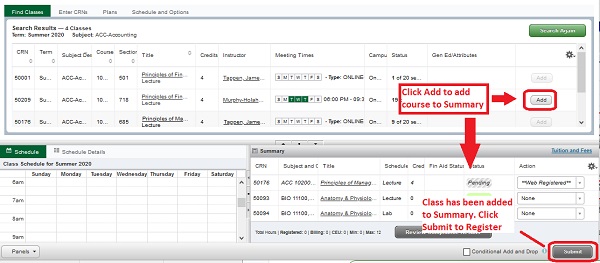
- Click Submit to register for the course. The enrollment status will then change to Registered. It is important to remember to click Submit to save your changes. Unless a course shows the enrollment status as Registered, you are not registered for the course. It will show Pending/Web Registered until you click Submit.
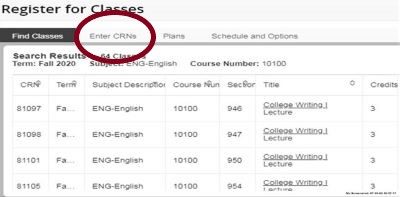
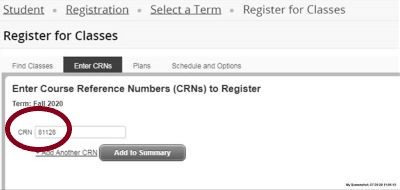
- Enter CRNs tab
- Click on the Enter CRNs tab to register for classes based on their Course Reference Numbers.
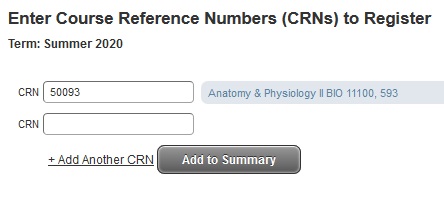
- To add multiple CRNs, click on Add Another CRN for each additional class that you wish to register for.
- When you have finished entering the CRNs, click Add to Summary for them to be added to your Registration Summary.
- Click Submit on the Registration Summary to register for these classes. It is important to remember to click Submit to save your changes. Unless a course shows the enrollment status as Registered, you are not registered for the course. It will show Pending/Web Registered until you click Submit.
- Click on the Enter CRNs tab to register for classes based on their Course Reference Numbers.
- Find Classes tab
How to Register When a Course Needs a Corequisite
How to Register
ENG 10100 and the Corequisite ENG 09800
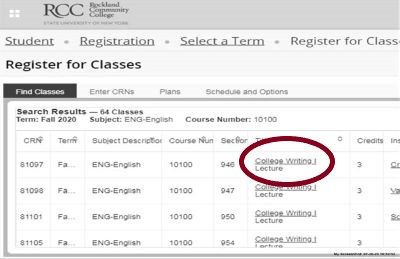
- On Self Service, Search for ENG 10100 and find the section time that you want
- Look for courses with a section number starting with a “9” (i.e. 944) – these are the sections that require the ENG 09800 corequisite course
- Click on the underlined, hyperlinked title of the ENG 10100 course so that the Class Details box pops up (as noted below)
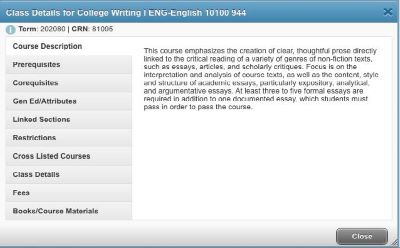
- Once in the Class Details box, click on the Corequisites tab to find the ENG 09800 section that is linked to this ENG 10100 course (see below).
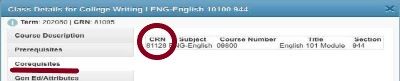
- Write down or note the CRN number of the ENG 09800 class that is linked to this ENG 10100 course (in this example, the CRN is 81128)
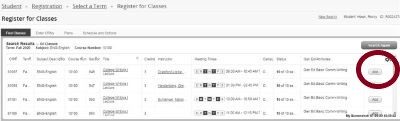
- Close the Class Details box and hit the ADD button (see below) to add the desired course ENG 10100 section to your Summary box that appears in the lower right hand corner of the screen. Let the ENG 10100 course sit in your Summary box for now. DO NOT SUBMIT YET.
- Find the Enter CRNs tab (see below). Click on it and enter the ENG 09800 CRN that you found in the Corequisite tab of the ENG 10100 Class Details box. In our example, the CRN is 81128. (See example below). Click on the Add to Summary button.
- Now, with the ENG 10100 and the ENG 09800 courses in your Summary box, and both marked with the status “Pending” and “Registered,” hit the Submit button in the lower right hand corner. You will see the status change for both courses to a highlighted green “Registered.”
How to Register
MAT 10110 or MAT 10010 and the Corequisite MAT 04810
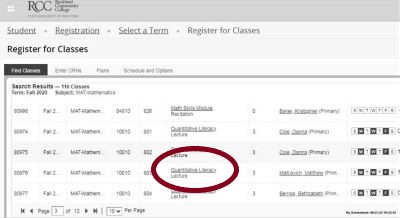
- On Self Service, Search for MAT 10010 or MAT 10110 and find the section time that you want
- Click on the underlined, hyperlinked title of the MAT 10010 or MAT 10110 course so that the Class Details box pops up (as noted below)
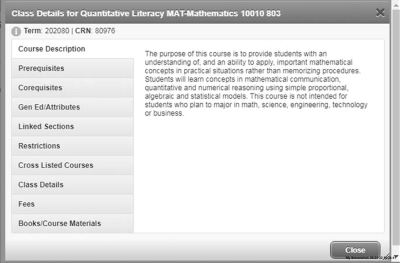
- Once in the Class Details box, click on the Corequisites tab to find the MAT 04810 section that is linked to this MAT 10010 course (see below).
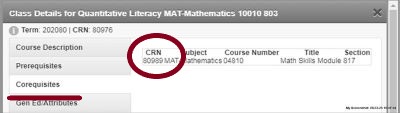
- Write down or note the CRN number of the MAT 04810 class that is linked to this MAT 10010 course (in this example, the CRN is 80989)
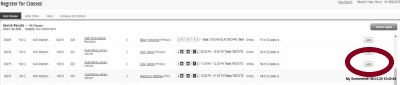
- Close the Class Details box and hit the ADD button (see below) to add the desired course MAT 10010 or MAT 10110 section to your Summary box that appears in the lower right hand corner of the screen. Let the MAT 10010 or MAT 10110 course sit in your Summary box for now. DO NOT SUBMIT YET.
- Click on the underlined, hyperlinked title of the MAT 10010 or MAT 10110 course so that the Class Details box pops up (as noted below)
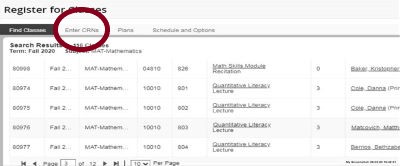
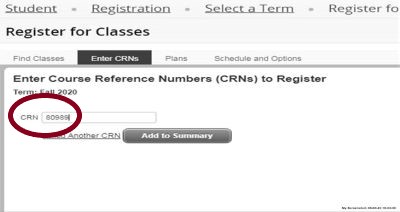
- Find the Enter CRNs tab (see below). Click on it and enter the MAT 04810 CRN that you found in the Corequisite tab of the MAT 10010 or MAT 10110 Class Details box. In our example, the CRN is 80989. (See example below). Click on the Add to Summary button.
- Now, with the MAT 10010 or MAT 10110 and the MAT 04810 courses in your Summary box, and both marked with the status “Pending” and “Registered,” hit the Submit button in the lower right hand corner. You will see the status change for both courses to a highlighted green “Registered.”
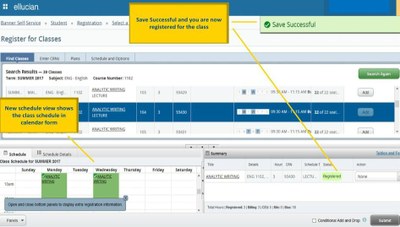
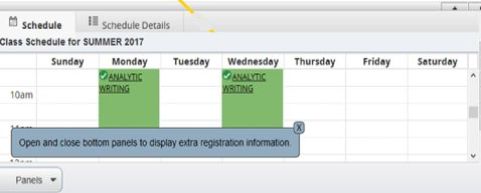
Viewing Your Schedule
Video: How to View Your Class Schedule
The Schedule window creates a visual weekly class schedule based on the classes for which you are registered, or for those which are pending in your Registration Summary.
Dropping Classes or Removing Previously Added Classes
- In the Action column, click on the drop-down menu next to the class that you would like to drop or remove. This will display the enrollment status options:
- Remove (for drops prior to the start)
- Drop (for drops in the refund period)
- Withdraw (for drops after the refund period).
- Click on the appropriate status.
- Click Submit. This will remove the course from your schedule and drop you from the class. NOTE: dropping a course after the start of the term or academic period may leave you with an outstanding tuition balance due to the College. Please see the Academic Calendar for more information.
It is important to remember to click Submit to save your changes. Unless a course shows the enrollment status as Registered, you are not registered for the course. It will show Pending/Web Registered until you click Submit.
How to Determine Course Mode
In-Person Courses
- In-person courses will be designated with a building and room number. Note: Some in-person courses may rotate attendance in the classroom; your instructor will describe the details of this type of attendance. Course capacities have been reduced for in-person courses and social distancing rules will be maintained.
Remote and Online Courses
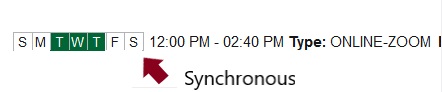
- Remote and online courses are either Synchronous or Asynchronous. These designations are noted in Self Service in the Meeting Times column on each course record. Please note that the columns in the course record can be expanded by hovering your mouse over the column separator and pulling the column wider to fully expose all the text.
- Synchronous means that there are routine course meeting times where class activities are conducted through a virtual platform. In Self Service, courses labeled Remote Learning, Online-Zoom, and Online-Collaborate are generally synchronous courses. Look for calendar days and times – – these are indicators that the course has designated, routine meeting times.
- Asynchronous means that there is no standard, routine course meeting times. In Self Service, courses labeled Online-D2L Brightspace are generally asynchronous. If no calendar days and times are indicated, then the course is asynchronous.

- Synchronous means that there are routine course meeting times where class activities are conducted through a virtual platform. In Self Service, courses labeled Remote Learning, Online-Zoom, and Online-Collaborate are generally synchronous courses. Look for calendar days and times – – these are indicators that the course has designated, routine meeting times.
Full Semester and Flex Start
Video: How to Register for Flex Start 2 Courses
To determine if a class is for the full semester or one of the flex start sessions, expand the meeting times column by dragging the right side of the column header until you can see the start date and end date.

- Full semester courses have a start date of the first day of the semester and end date of the last day of the semester
- Flex Start 1 courses have a start date of the first day of the semester and end date in October for fall and March for spring.
- Flex Start 2 courses have a start date in October for fall and March for spring and end date of the last day of the semester
Schedule Planner Instructions
RCC’s Schedule Planner allows students to quickly create conflict free schedules based on our current class offerings. Students select classes, put in times they are not available and the Schedule Planner gives them multiple options of schedules that meet their needs.
Watch the video and follow the instructions below to create the perfect schedule!
PLANNING YOUR SCHEDULE
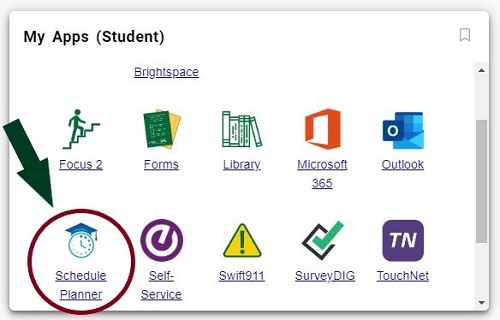
- Log in to myRCC and click on Schedule Planner from the list of “My Apps”:
- Select a term and click “Save and Continue”:

- Select a campus and click “Save and Continue”:
NOTE: You can select more than one campus OR you can select “Select All Campuses.”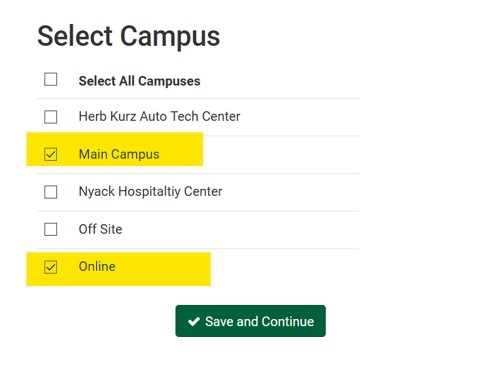
- Filter your search and make changes as needed:
- Course Status (Open or both Open/Full)
- Campuses (Main Campus, Nyack Hospitality Center, Online, etc.)
- Instruction Mode (e.g. Asynchronous, Synchronous, etc.)
- Term (Winter 2023, Spring 2023)
- Part of Term (e.g. Flex I, Flex II, etc.)

Synchronous means that there are routine meeting times where class activities are conducted through a virtual platform.
Asynchronous means that there is no standard, routine course meeting times.
For more information on Instruction Modes and Parts of Term please review the How to Determine Course Mode section on this page.
Visit the Academic Calendar for Full and Flex Start dates.
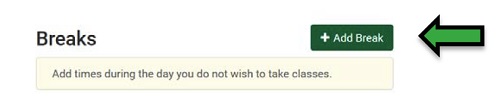
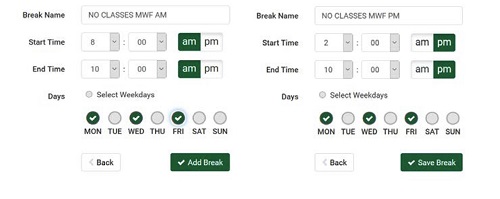
- Click “ADD BREAK” to indicate times you do not wish to take classes (*recommended*):
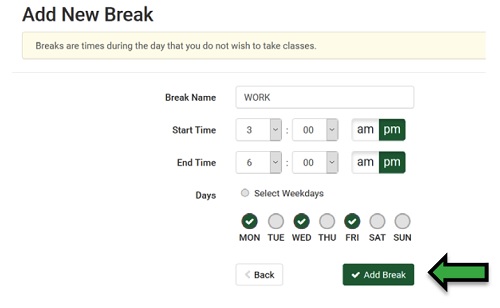 Tips to utilize this feature:
- Create multiple breaks to narrow down your search.
- If you want a Monday/Wednesday/Friday schedule, create a break on Tuesdays and Thursdays:
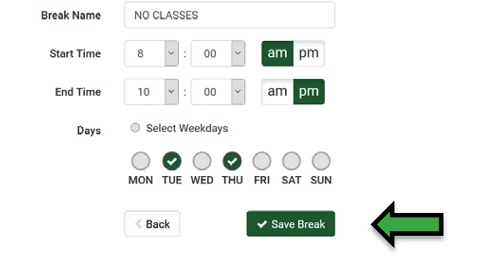
- If you want all your classes between 10am and 2pm, create a break that ends at 10am, and another break that starts at 2pm.
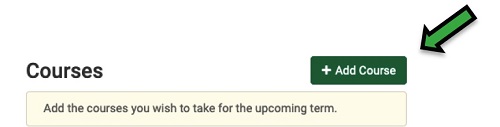
- Click “Add Course” to choose classes.
 You can search by SUBJECT (e.g. Biology), ATTRIBUTE (e.g. Western Civilization General Education), or INSTRUCTOR NAME:
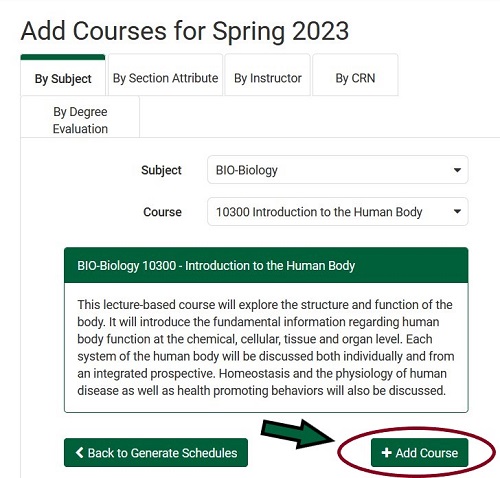 After you add a course, it will pop up on the right hand panel under “Courses”:
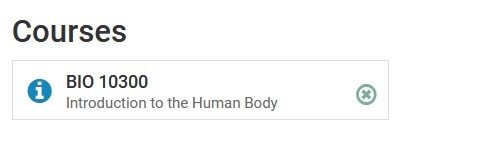 To add another course, click on the SUBJECT field and make a new selection from the drop-down menu OR select a new search criteria (attribute, instructor, etc.). Once you have added all your courses, click “Back to Generate Schedules”
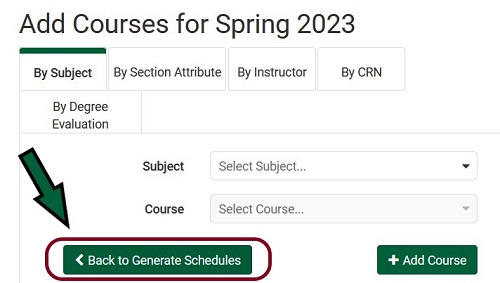
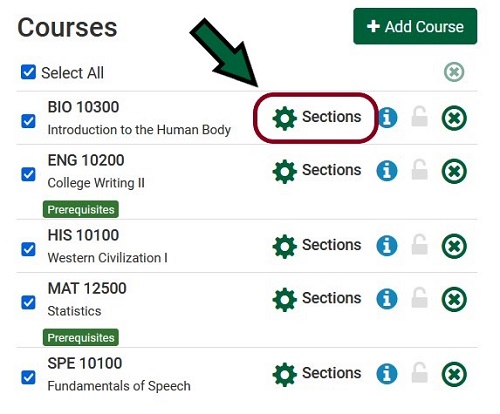
- To narrow down your options, click on “Sections” to view the available options for each section. De-select the sections that you don’t want:
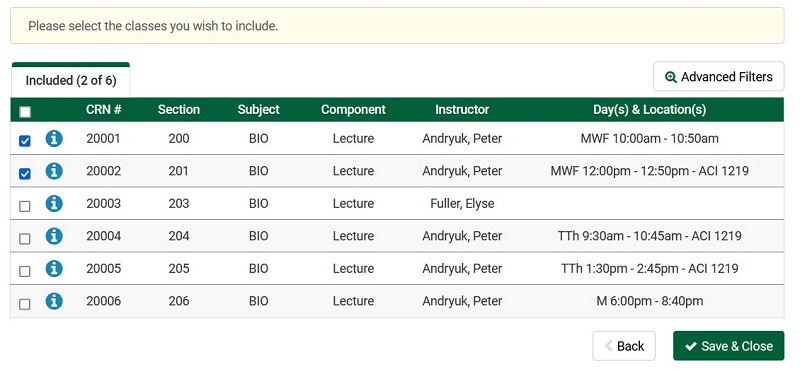 NOTE: If there are no times listed, the course is asynchronous online!
 - After adding all of your courses click “Generate Schedules”. Browse your schedule options and click “View” to see details. You can also check off at least two schedules, and select “Compare” for a side by side comparison.
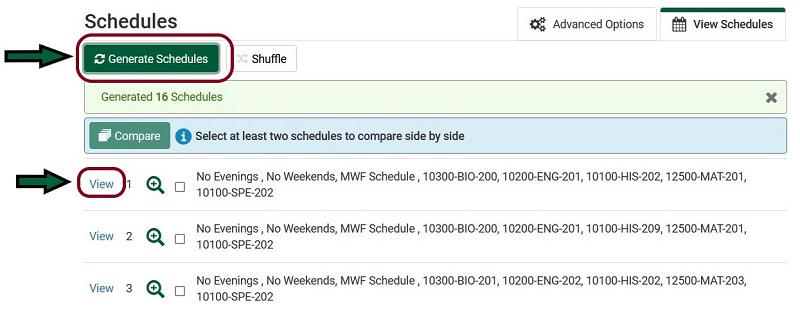
- Once you click “View” you can review the schedule details. Click the arrow at the top right corner to scroll through possible schedules:
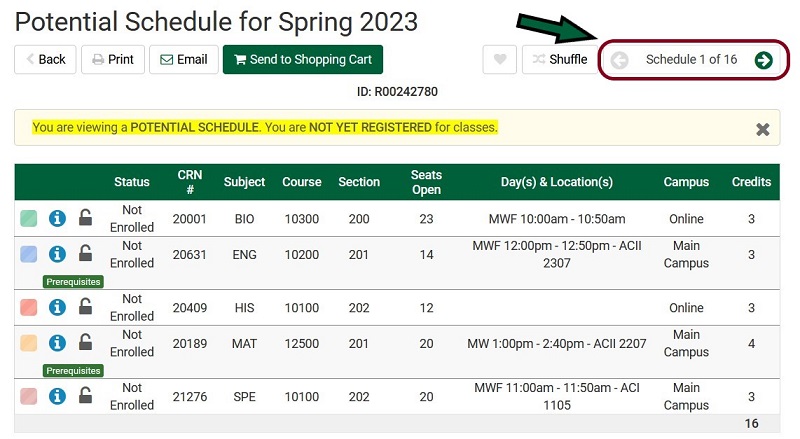
TIPS:
- If you find a specific section for one of your courses that you prefer, you can lock that section down, and the number of possible schedules will decrease. Click the lock icon on the course:


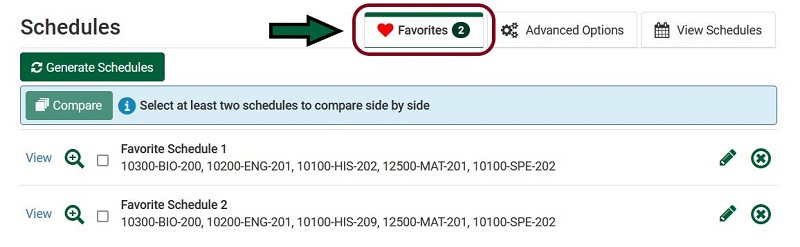
- Save possible schedules using the “Favorites” heart icon to narrow down your search, or to save your schedule before you are able to register:

Important: Saving a Favorite schedule does not reserve you a seat in the class.
To return to your favorite schedules, go back to the “Build Schedule” page, and find the Favorites tab near the Generate Schedules button: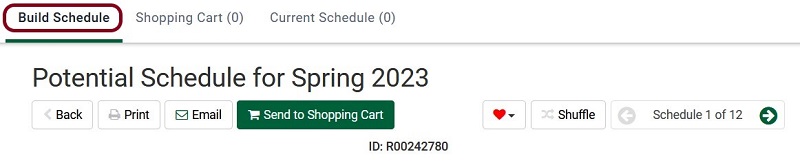
REGISTERING FOR CLASSES
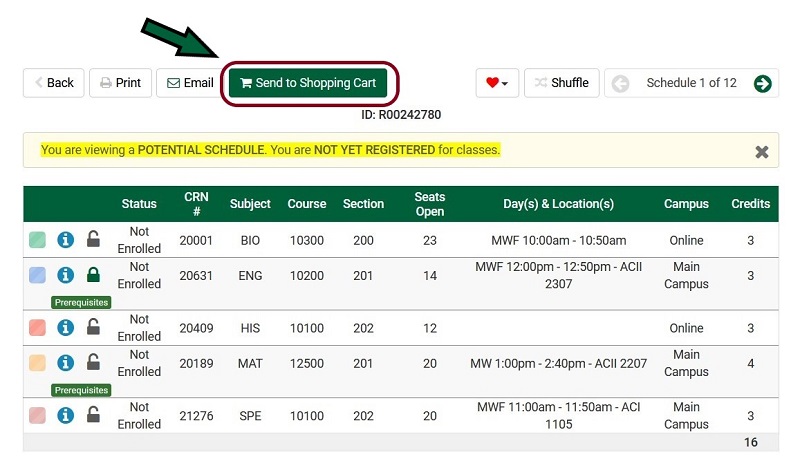
- Once you have finalized a schedule, pull up the schedule details (click on “View”), and click Send to Shopping Cart.
- Once in the Shopping Cart, review your schedule and then select Register:

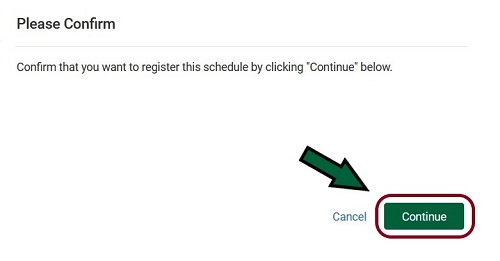
NOTE: If you need to make any changes, select Edit Cart to de-select a course. If you need to add a course, you will need to go back to the Build Schedule page. - Click “Continue” to confirm your registration:
- You will see the “Processing Enrollment…” pop-up appear on your screen:

NOTE: If you have a REGISTRATION HOLD, such as a finance hold, a pop-up will appear on your screen, instructing you to resolve the hold before you can register. The courses will remain in your Shopping Cart.
Once, processed you will see Registration Results, listing the courses you have been registered for, and any classes for which registration could not be processed: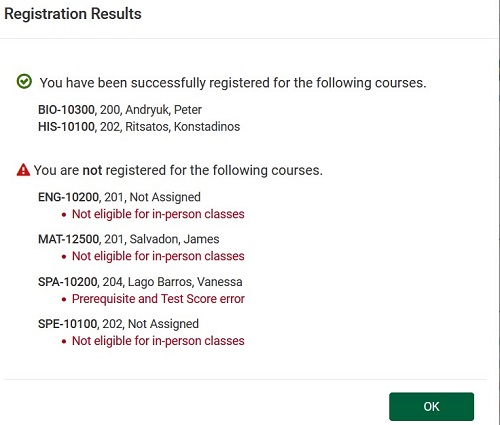
MAKING CHANGES TO YOUR SCHEDULE
Once you log into Schedule Planner, you will see current schedule. If you need to add or drop any courses, you can do so from the Build Schedule page.
To ADD a course:
- Click on the ADD COURSE button to add a new course, or you can add a course that may already be on your Shopping Cart.
To DROP a course:
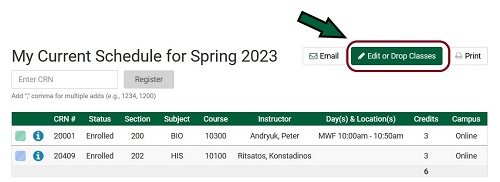
- Select Current Schedule from the navigation bar at the top:

- Click on the Edit or Drop Classes button:
- Update your Registration Status by clicking on the drop-down menu next to the course you wish to remove, changing the status from Enrolled to Drop/Delete:
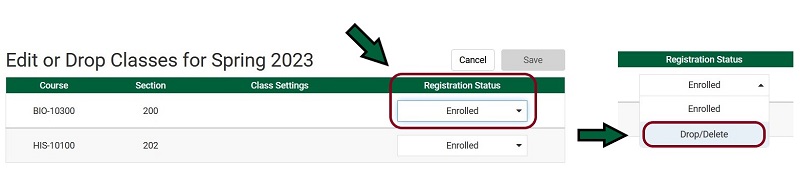
- Once you are prompted to confirm the changes, click SAVE.
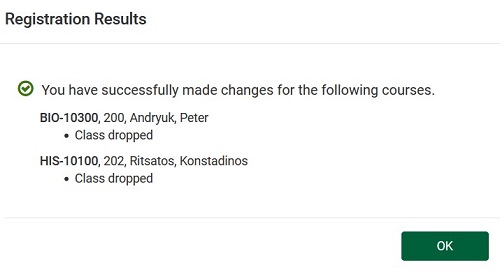
- Once the changes have been processed, you will see your updated Registration Results, listing the courses that have been dropped:
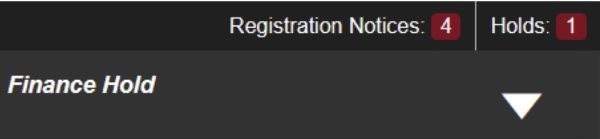
How to Check if You Have Registration Holds
- Log Into your myRCC Portal
- Click on SELF SERVICE
- In the UPPER RIGHT-HAND CORNER of your Student Profile page, click HOLDS
- Review your holds and who to contact
Example: